Monday

Better Know a Necron: The Necron Lord

"Statistics, Logistics, Economics, Tactics, Luck, and Determination or How To Be A Good Theoretical General." Post 010

"Boop." ZstXkn, Necron player

Released in August 2002, and seen as the cheesiest codex at the time, this 3rd ed. codex has fallen by the wayside with the coming of 4th and 5th ed. rules and increased nerfing from official FAQ's. Though no longer seen as tournament worthy army and in dire need of an updated codex (GW sees this as a high risk investment due to low player interest) this codex can still be competitive. If the controlling general uses the synergy of the Necron units and knowledge of their opponents codex, they would be able take advantage of the game using the Necron's surprising mobility and survivability.

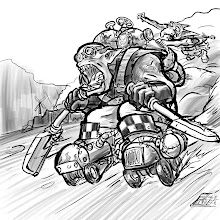
In this, Part 1 of 12 in the Better Know a Necron series, we will cover the head honcho of your Necron army: the Necron Lord.

"The most sophisticated of the C'tan's servants, the Necron Lords act as leaders and energy loci for the Necron warriors" and as such bare the stats and wargear that make them a versatile HQ choice. Though he is the same point cost as a SM Captain but has a smaller stat line than one, the Lords real talents lie in his wargear.

The basic wargear for your everyday Lord involves the Staff of Light and Resurrection Ord. The Staff fires three S 5 AP 3 shots and the Res Orb allows all Necron units within 6" of the Lord (including the Lord himself) to make Will Be Back rolls against weapons that would otherwise ignore it (Close Combat Weapons that allow no Armor saves and weapons with Strength double their Toughness). Other common wargear include the Destroyer Body, Phylactery, and Warscythe.

Some of the wargear setups and tactics when using the Necron Lord include:

Anti-Vehicle (Destroyer Body, Phase Shifter, Resurrection Orb, and Warscythe)
Focusing on speed and survivability this Lord Turbo Boosts around the board targeting the most expensive vehicles and squadrons that need to be dealt with as soon a possible, teaching them the meaning of four attacks at S 5 + 2d6 penetration. Best selected as a second Lord, as he provides little support to the rest of the army.

Anti-Low-Ld-Infantry (Chronometron, Nightmare Shroud, Phylactery, and Resurrection Orb)
When fighting Imperial Guard and other low Ld armies this Lord makes every unit within 12" roll leadership as if they had taken 25% loses (a 41.67% chance of failing with Ld 7). And with the Chronometron and Phylactery the Lord has a greater chance of overrunning/falling back and in case of death, possibly getting back up with more than one wound to continue the red-shirt beat down. Best when deployed out of a Deep Striking Monolith so he can be in the middle of their army without being shot at along the way.

Deep Striking Lord (Resurrection Orb, and Veil of Darkness)
A simple setup, use this Lord to keep warriors fighting and Veiling around the board to avoid close combat. On the last turn take an objective or contest one, which ever makes more sense for the situation.

Deep Striking Lord #2 w/ 20 Warriors (Gaze of Flame, Lightning Field, and Veil of Darkness)
A riskier setup, this Lords ability to deny the +1 Attack for charge bonus and Lighting Field to deal extra wounds back from a charging attack makes him perfect for quick unit killing. Veiling next to a unit, firing with warriors, and minimizing loses from the ensuing assault is this Lords prime objective. If all goes well and the unit is still in one piece the next turn Veil, out of assault if needed, or move then shoot some more. Biggest risk of this setup is the lack of a Res Orb, suicide in the eyes of many, giving it an inherent weakness to powerful large blast templates. I strongly suggest destroying units/vehicles with these templates first and fore most.

Destroyer Support (Destroyer Body, Phase Shifter, Phylactery, Solar Pulse and Warscythe)
Simple enough, this Lord kites around with your destroyers taking Invulnerable saves when needed and giving them one turn of protection from incoming fire. No Res Orb needed here seeing as the Destroyers are T 5 and only need to worry about not getting Will Be Back if assaulted with power weaopns for some reason (or they get shot in the face with more then one S 10 weapon from a single unit. Tau!).

Pariah Escort (Chronometron, Gaze of Flame, Nightmare Shroud, Phylactery, Solar Pulse, and Warscythe)
The rarest of all units taken in a Necron army, the Pariahs really live up to their name. However, against an aggressive assaulting army (Ork, Tyranid, or some fast moving Imp Guard) and/or when accompanied by this Lord they stand a greater chance of doing something useful. Running under the cover of the Solar Pulse and using Nightmare Shroud with Soulless makes it so even the most resolute enemy stands a chance of falling back. If the unit, Lord and all, makes it into assault the opposing side is at a base Ld of 6 with Gaze of Flame and Soulless in effect. And Chronometron lets you roll two dice (take the highest) for Initiative checks, increasing your chance of an Overrun.

These are six of the dozens of possible wargear combinations and play styles that one could do with a Necron Lord. Hopefully you learned something today. Join me next time for Better Know A Necron: Part 2, The Lowly Pariah. When I will find out if the "Look over there!" distraction trick really works in games other then chess with old people.

Friday

Legion of the Damned

"Statistics, Logistics, Economics, Tactics, Luck, and Determination or How To Be A Good Theoretical General." Post 009

The Legion of the Damned and other Cursed 21st Foundings have been added to the new Space Marine codex as an Elite choice. However, even though this powerful unit is now an addition to the codex, I've never seem anyone use them. So what better way to start my new segment, Unit Overview, than with this under appreciated unit.

Lets start with a brief history of the Legion of the Damned in the game. They were originally a White Dwarf unit like the Deathwatch Killteam that were then put into the old Chapter Approved books that could be used with the permission of your opponent. Rule wise, they were almost the same as they are now with the real difference in point costs.

Now for some of the rules. The Legion of the Damned have 'Fearless', 'Slow and Purposeful', 'Unyielding Spectres' and 'Aid Unlooked For'. 'Unyielding Spectres' gives them a 3+Sv/3+Inv and 'Aid Unlooked For' makes them always come in by 'Deep Strike' and may re-roll the 'Deep Strike' Scatter Die. The build for the squad is much like a build for a Tactical Squad, the only difference being you don't need to have 10 models in the unit to carry special and heavy weapons.

Combining the rules 'Deep Strike' and 'Slow and Purposeful' as well as a combination of a heavy weapons and their special weapon counterparts, one can make a squad capable of dealing with any problem the moment they enter the game. Putting three melta weapons or two meltas and a Lascannon in the squad can deal with vehicles and three plasma weapons to deal with those heavy armored units or 3 flamers to deal with the large lightly armored units. With every squad I recommend taking a Power Fist. Your +3 Inv will save you from most Monstrous Creatures and Power Weapon attacks and you want to be able to hurt them back, or just insta killing any T4 or less character.

Wednesday

40k in a Flash

"Statistics, Logistics, Economics, Tactics, Luck, and Determination or How To Be A Good Theoretical General." Post 008

One of my favorite ways to play 40k is not with in drawn out battles, but with small limited army lists. In 4th Ed what was called Combat Patrol and 40k in 40 Minutes is most commonly known now as “40k in a Flash." This is when players only get 400pt to make their army lists and as such, the games go by really quickly.

Some rules were made by GW for the 400pts games:
  • Armies must have 1 Troop Choice minimum
  • Armies may have 1 HQ Choice, but no more than 1
  • No model may have more than 2 wounds
  • No special characters
  • No 2+ saves
  • No vehicles with a total armor value of more than 33 (add front, side, and rear together)

This new type of game play was very rarely played then, as it is now, although larger tournaments have 40k in a Flash competitions. Something that is always fun about this game to me is trying to come up with the best army list you can with such a limiting point value. So, I'll be posting some of my 400pt creations as a way to try to get this game to be a little more popular and just for the fun it (its a good brain exercise).

Sunday

Sacrificing Units (a.k.a. For the greater good!) Part 3

"Statistics, Logistics, Economics, Tactics, Luck, and Determination or How To Be A Good Theoretical General." Post 007

Engage in combat fully determined to die and you will be alive; wish to survive in the battle and you will surely meet death.” Uesugi Kenshin

Some examples of half of your army:
  • Half of your army

This is quite simply the idea of letting half your army be massacred (not without a fight of course) so the other half can get the advantage. It is a very risky tactic. It can lure your opponent into a false sense of victory and when he makes a mistake, you can act upon it. This is best used when you have some powerful and fast assault units in reserves or out of site for the majority of the game (see Reserves 104 for example). A similar list can be made by combining a large mass of cheap Imperial Guardsmen backed up by Leman Russes and Hellhounds (and don't worry about blowing up your own guys).

Sacrificing Units (a.k.a. For the greater good!) Part 2

"Statistics, Logistics, Economics, Tactics, Luck, and Determination or How To Be A Good Theoretical General." Post 006

"I regret that I have but one life to give for my country." Nathan Hale

Some examples of powerful baiting units:
  • Space Marine Thunderfire Cannons
  • Space Marine Sternguard with a Drop Pod
  • Imperial Guard Basilisk and Medusa Batteries
  • Ork Lootas
  • Eldar Fire Prisms
  • Necron Destroyers and Heavy Destroyers
  • Tau Broadside Suits

Units in this category can all considered to be the center pieces of the army they are in, and it is a fact that the vast majority of players would never consider them as units to be thrown away at the cost of potential victory. Nevertheless, this is a solid strategy in games where your troop choices are more valuable or your opponent has an assault based army and you need to separate it to ensure victory.

One of the best units to use for baiting is the 100 point Space Marine Thunderfire cannon. This new edition to the Space Marine arsenal is one of the most powerful anti-infantry weapons in the game for its point cost, and with its different types of ammunition and 60" range it is useful in almost every army. As a sacrifice though, the range and ability of laying down fire makes this unit a great bait for any mobile opponent. Just by simply putting the cannon in one corner of the board (in a building for a +3 cover save with the Techmarine's Bolster Defenses is best) and the remainder of your army in the other corner will put your opponent in a precarious position. To send units after the Thunderfire or to take shots from the Thunderfire all game? Ether way, you can rest assured of victory or draw with this tactic in play. This tactic can also be used with Imperial Guard Basilisk and Medusa Batteries, Ork Lootas, Eldar Fire Prisms, and Tau Broadside Suits.

Another method to using powerful units with the ability to be anywhere on the board is what many call “kiting”, the process of dragging your opponent's unit or units to where you want them to be by using superior mobility (like guiding a kite on a string). The most prime example of a kiting unit are the Necron Destroyers and Heavy Destroyers. This unit, as Jetbikes and Platforms, can move 12” and fire their heavy weapons or Turbo Boost for 24” in a pinch. So a good tactic, similar to the Thunderfire Cannon, is to put them on one side of the board with your army on other. Then using their range and mobility move them to always be just in range (36” for Destroyers, 48” for Heavy Destroyers). If your opponent moves forward after them, just move back to keep them at the edge of your range (hence, kiting).

One other form of baiting/kiting is one that resembles what would happen if someone fired a heat seeking missile in one direction and you light yourself on fire to get it to turn around. This can be done with any Deep Striking unit but is best done by a unit of Space Marine Sternguard in a Drop Pod. Mounted in the Drop Pod secures that the Sternguard well land unharmed, and with there firepower you can drop them behind enemy lines to force your opponent to turn his army around to deal with them (If it's a 1500 or higher game, throw Lysander in the mix and get some re-rolls on the bolter shots).

Friday

Sacrificing Units (a.k.a. For the greater good!) Part 1

"Statistics, Logistics, Economics, Tactics, Luck, and Determination or How To Be A Good Theoretical General." Post 005

"Be resolute, fear no sacrifice, and surmount every difficulty to win victory." Mao Zedong

We all know the meaning of sacrifice. But in game terms I am referring to those units of warriors that you put in positions where you know they are dead meat. Why would one want to sacrifice any unit in his army? You would think that in an equal point game you need all your army to win the game, however this is not always the case. If you were to keep track of the kill to death ratio for each of the units in your army you will find that some of them kill other units more often than they die (my Lootas for instance have a 6 to 1 ratio over the last few games). For those units that tend to be on the field to soak up more damage than they dish out or are used to kite your opponent, these are what we call sacrifices.

There are a few different types of sacrificing units out there. You have your “Hey, shoot at me or else I'm going to annoy you,” the “I'm going to piss you off all day unless you come deal with me,” and the “Hey, half my army is defenseless. Just don't look at whats happening over here.” This can be summed up into units that are large but don't have the killing power to win a game for you, powerful units that you bait with, and the half your army approach.

Some examples of large, relatively useless units are:
  • Imperial Guard Conscripts
  • Nercon Scarab Swarms
  • Tyranid Spine Gaunts and Rippers
  • Ork Gretchin
  • The Nightbringer (Sadly, yes)

These units have their own advantages and disadvantages, but normally people don't use them because they don't do enough damage. Those that do field these kind units use them for primarily sitting back and holding objectives. In terms of sacrifices, these units are excellent. My Tyranid playing friend before (I will call him Oz from now on) will use full units of Spine Gaunts to sit on an objective the whole game (out of Synapse range and in cover they gain Lurker and Going to Ground giving them a +2 cover save in ruins and buildings) or use them to rush in and hold up walkers and basic infantry. In one of the more annoying cases, back when I played Chaos, he would give them leaping and have them assault my Defiler. He couldn't hurt me, but I could only kill two or three a turn. So my only options where to go assault them with one of my more powerful units or forfeit my Defiler for the rest of the game.

With the new Imperial Guard codex and Commander Chenkov, Conscripts make great run in and die units (seeing as how the unit comes back into play after it is destroyed. But another more combat efficient Conscript sacrifice squad is one that has all 50 models in it and is lead by a Lord Commissar (or worse Commissar Yarrick).

Special example for this part of sacrifices, the Nightbringer. A large, scary, point heavy model that has the stats to make any player wish he never has to see close combat with it. The big problems with the Nightbringer are his inability to be effective at ranged combat (so running him as fast as possible is your only viable option) and his lowly 4+ armor is just sad for a Star God. The up side to him is his large wound count and toughness 8 (meaning only strength 5 weapons and higher can even hurt him). Use him to be a figure head of your army, run him in to your opponents units as fast as possible and hope they are foolish enough to spend a turn or two firing all their heavy weapons at him trying to bring him down.

Thursday

Reserves 101, 102, and 104. Part 3

"Statistics, Logistics, Economics, Tactics, Luck, and Determination or How To Be A Good Theoretical General." Post 004

"I have not yet begun to fight." John Paul Jones

Part three of three, Reserves 104, will cover all those tactics that make other players fear to play you, including some cheesy army ideas, ways to intimidated, and an example of play were reserves came though to save the day.

One of the most under rated armies in all of 40k is the lowly Necrons. I played Necrons for about 2 years back when 4th Edition came around. But back then taking an army of Necron Warriors with Destoryers for Fast Attack was one of the most devastating armies one could have with the old rules on target priority and shooting through terrain. Now most armies walk over Necrons without lifting much more then a finger, but more on that when I get to the Necron Codex.

For the topic on hand though, with the new reserve rule one can make a feared army list with this outdated codex. This list can be run in a 1250 point game (so think of that when you are thinking of how you can beat it), and it comprises of:
  • 2x 10 man squads of Warriors
  • Lord with a Resurrection Orb
  • 3 Monoliths (Yes 3!!)
Now the average player will look this and say “WTF, 3 Monoliths!!! Oh wait, I can just kill off 15 of the Warriors and they will phase out.” But with reserves, you may not see those warriors until the 2nd, 3rd, or help you, the 4th turn, later, or never... So you have three Monoliths moving across the field shooting Space Marine-killing pie plates with their armor 14, and most army lists cannot afford enough Lascannons or equally powerful weapons to guarantee killing one of these per turn (A 2:27 that a Ballistic Skill 4 unit with a Lascannon destroys it, and a 1:18 if the unit has BS 3). Good luck phasing this army list out is the only thing I have to say to anyone brave enough to fight it.

To end this post and topic I'm going to give an example of a game I played about a week ago where the use of Reserves gave me a quick win over one of my friend's army. Its long, but if you are in need of help with using reserves it will hopefully give you some more ideas on using reserves with your army.

I was in a 1850 game with my Orks against my friend's Tyranids and the mission type was Capture and Control with a Spearhead Deployment. The terrain was pretty flat with very little blocking line of sight and my friend won the roll for deployment.

As any good Tyranid player would he then proceeded to cram his army as close to me as it could possibly be. Knowing that he is going to run straight for me with everything he's got except for his Warriors and Gaunts, I deployed my two Loota squads, Looted tank, and one of my Trukks with a Warboss and my Ard' Boyz up aginist my corner of the board and reserved my two other Trukks with a Warboss, and a full squad of Shoota Boyz.

As the game began my friend knew I had half my army in reserves, and as such he was less inclined to rush his whole army out, in fear of being surrounded. This slowing of movement only gave me more time to shoot with my Lootas and boom gun, and after the first turn he was down a Genestealer squad and a few Warriors. Turn two, my friend moves his army around and spreads out into a crescent shape surrounding my corner. I lose my Looted tank to a damn fast Carnifex, oh well. My turn, none of my reserves come in against the odds (not a problem) so I move my Warboss and Ard' Boyz into assault with the Carnifex that destroyed my tank, and kill one more Genestealer squad and some of the Gaunts with the Lootas. Assault phase of turn two, wipe out the Carnifex and take a wound on my Warboss.

Turn three, being down to only one troop choice now, my friend runs his Genestealers behind one of the only line of sight blocking pieces of terrain to keep it safe until the end of the game. Warriors shoot the snot out of one of my Loota squads and a Carnifex and Hive Tyrant with 3 Guard assault my Warboss and Ard' Boyz, wiping it out with an overrun but not before my Warboss took down the tyrant with his Power Klaw.

Bottom of turn three, the game ender. All my reserves are in play now, I put my Boyz only Trukk on the other side of the board and start driving them to my friends objective. My other Warboss and his Boyz drive in, jump out of the Trukk, Waaagh!, and engage the other Tyrant on the board that was sitting on his claws waiting for my reserves to come in (my friend did forget about the Waaagh! rule, so silly him, he thought he was far enough away ^^). My last Loota squad unloads 45 shots into the remainder of the Guants and wipe them out. My Shoota Boyz come in not 3" from the remaining Genestealers, unloading their Shootas and then assaulting to finish them off and my friend's ability to hold objectives. After the assault phase with only a few Warriors, some beaten up Guard, and a heavily wounded Carnifex, my friend conceded defeat.

Reserves 101, 102, and 104. Part 2

"Statistics, Logistics, Economics, Tactics, Luck, and Determination or How To Be A Good Theoretical General." Post 003

"There's more than one way to look at a problem, and they all may be right." Normal Schwarzkopf

Part two of three, Reserves 102, will cover more advanced tactics, some philosophies, and ideas on using reserves.

Advanced Tactics: Every time I go to a tourney or just down to my local GW, it is a rare site indeed to a see players using the reserve rules for there army. The only exceptions to this is the rare Space Marine player how is using an all Drop Pod army, and me. I almost always use reserves, that rule has won me to many games for me not to consider it (its a 1/18 that I don't use reserves to be exact).

A good time to use reserves is when you know you are going to be facing a primarily assaulting army. Having a fast assault or special weapons squad in reserves can give you the edge in games where you need to “divide and conquer” or just to put them where you need them in the middle of the game. Reserving is also a great way to spread yourself out in Spearhead games, just make sure you have transports for your objective taking units cause they are going to need the speed of a vehicle to get across the board in 4 turns or less.

A good idea on when to reserve is when you know you are fighting a deep strike based army, like a drop pod or terminator army, some eldar armies, or an air calvary imperial guard army. In the cases of the drop pod army, half the army must come in on the first turn. So as an all reserving army if you have lots of vehicles (say 9 leman russes ^^) you can guarantee that you will get to shoot your cannons off first before those meltaguns get the chance to drop pod next to you.

Reserves 101, 102, and 104. Part 1

"Statistics, Logistics, Economics, Tactics, Luck, and Determination or How To Be A Good Theoretical General." Post 002

“Ability is of little account without opportunity.” Napoleon Bonaparte

Welcome to part one of three, Reserves 101, where I will cover the rules, and some of the basic tactics of using the reserves rule with your army.

The skinny: Units that are not deployed on the first turn are said to be in reserves. Units in reserve have chances to come in during the game from the long edge of that players board edge with increased odds of coming in as the game progresses. The roll needed for a unit to come in on the 2nd turn is a roll of +4, 3rd turn is a +3, and the 4th turn and on it is on a +2 (Quick dice 101. Six sided dice or d6, is the only numerical dice used for WH40k and all following roll numbers will be on this kind of dice. the +# being the number needed or any number higher to succeed at the roll, a +4 being a success on a 4, 5, or 6). When units come in from reserves they are moved in up to there maximum distance measuring front the board edge rolling for difficult terrain as needed. (move as if measuring from the front of the base or vehicle to the front. No, your land raider cannot come out 12" and only count as moving 6", nice try kiddo)

Basic Tactics: Sometime you just don't need that unit on the field possibly getting shot at, or worse in most cases, assaulted. When you have units that are just meant to hunker down and hold an objective on the edge of the board it can be a good idea to put them in reserve to prevent them from getting shot at for at least the first turn. When you have an army that is rooted in heavy weapons fire from every squad, say your average Imperial Guard army, reserving may not be the best idea. With armies like these every turn you aren't shooting is another turn wasted, so reserves aren't for you.

A brief history, Warhammer and me


"Statistics, Logistics, Economics, Tactics, Luck, and Determination or How To Be A Good Theoretical General." Post 001

"Victorious warriors win first, then go to war. Defeated warriors go to war first, then seek to win." Sun Tsu

I've been playing Warhammer 40k for about 13 years now, and as a guy it started the same way most guys get into things, with a picture (see picture above). After I saw that book at the local hobby shop that there was no turning back. I found out that one of my friends had some miniatures from a year before that he had never put together and but had never really planned on playing the game. After a quick chat with him and about a months worth of chores I got my first minis (two tactical squads, a whirlwind, and Captain Tycho). After reading though the 3rd Edition Rulebook and the Blood Angel codex I played my first game, which looking back on it was nothing like the actual game is played, but I guess thats what most peoples first at home game is like XD.

Some time passed, a few more of my friends started playing, and we all started getting the actual rules of the game down. Then they built the Games Workshop store in Oakridge Mall, many summer days were spent at that store from open to close for the next few years. As the years pasted I became wiser with age and as such because a very powerful player. With my imagination I found myself as one of the best players in the region with only a hand full of loses under my belt. Last year they started holding monthly rouge trader tournaments at the regional games workshop HQ at Alamo, CA and I went 3 for 3 in Best General and 1 for 3 Best Overall (2 in 1 ^^) in there first three tournaments with my new Ork army.

As of late I've been working on making my own space marine special characters and revising old characters to be used with the new codex as well as trying to come up with the most powerful army lists I can for each codex (I'll be posting these so I can get some opitions and so people can try them themselfs).

And that is my Warhammer career so far in a nut shell, more information and my history as a gamer will be mentioned later when they become reliant.